Want to add a touch of natural charm to your spaces? A tongue and groove pine ceiling could be just the answer. A sought-after style for its timeless aesthetic and versatility, this guttering will go with any room, be it a rustic vibe or a contemporary feel. It’s a favorite among DIY enthusiasts, too, thanks to its relatively simple installation process.
Thank you for reading this post, don't forget to subscribe!This guide explains everything you need to know, from tools and installation methods to design ideas and maintenance tips, to make sure your project is enjoyable and worry-free.
How to Choose a Tongue and Groove Pine Ceiling?
Benefits of Pine Ceilings
Tongue and groove pine ceilings add beauty and functionality to any home. Here’s why they’re so common:
Pine’s natural grain and knots give the wood a warm, welcoming look. It fits effortlessly in modern, rustic and farmhouse styles.
Durability: Pine is a strong material, and with proper care can last for decades.
Insulation: The natural insulation properties of pine keep the room cooler or warmer, depending on the seasons.
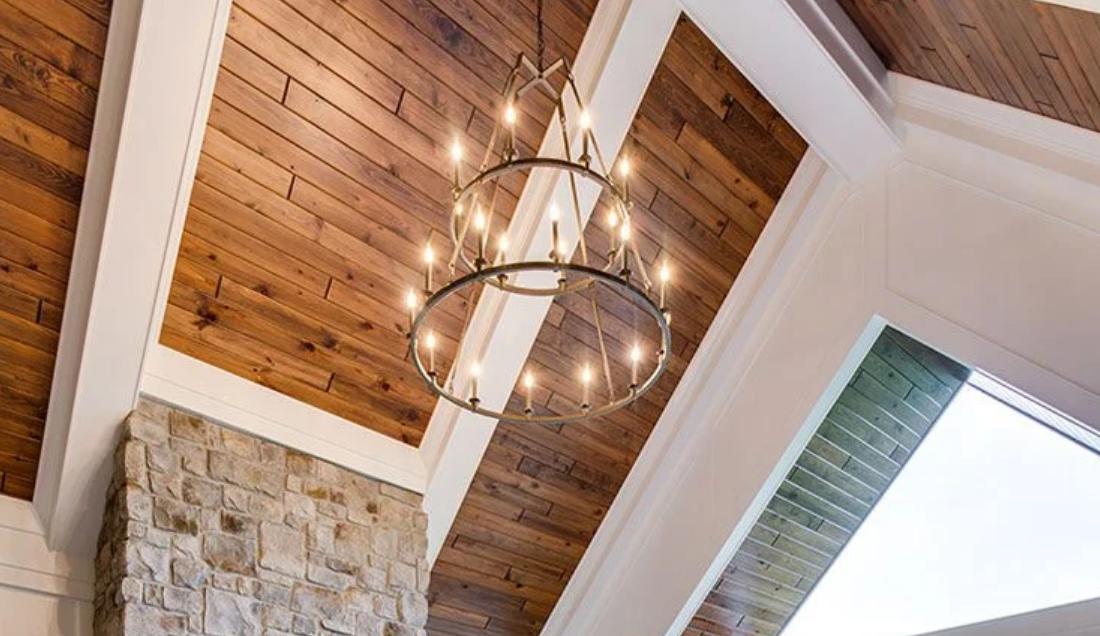
Finish Flexibility: You can achieve a natural pine look, stained finish, or painted panels.
User Friendly Assembly: Ideal for DIY projects, tongue and groove boards allow you to complete a project that looks professionally done without having to hire a professional.
The Advantage of “Tongue and Groove”
The special “tongue” edge on one side of the panel slips snugly into the “groove” on the next board. This effectively eliminates gaps and adds structural support, providing a seamless and secure fit.
What You’ll NeedTools and Materials
Before you dive in, you’ll need to round up the following tools and materials to help make the installation go smoothly:
Materials:
- Tongue and groove pine boards
- Wood screws or nails
- Wood filler (for gaps)
- Stain, paint, or sealant (optional for finishing)
Tools:
- Circular saw or miter saw
- Level
- Measuring tape
- Nail gun (or a hammer and finishing nails)
- Stud finder
- Reinforced sandpaper or an orbital sander
- Safety glasses and gloves
How to Install Tongue and Groove Pine Ceilings: A Step by Step Guide
Preparation is Key
- Measure the room to see how much pine you’ll need. Allow 10 per cent extra for waste or cutting mistakes.
- Find ceiling joists with a stud finder. Mark these locations, they will be important to secure your timely boards.
- Check your boards for defects and sand rough edges. This ensures a smooth finish.
Cutting the Boards
- Using your circular saw or miter saw, measure and cut your boards to length. Be specific so that it fits snugly.
- If you intend to add lighting or fans, cut holes into your boards where necessary before installation.
Installing the Boards
- Begin at one end of the ceiling. Position the groove side of the first board against the wall. Nail through the tongue at a 45-degree angle to secure it. You can speed this up with a nail gun.
- Slide the first board for workers as-and-so and tongue and groove over the second board. Lightly tap the pieces together using a rubber mallet to ensure the fit before nailing.
- Proceeding across the ceiling, check each board before nailing it to the joists that it is level.
Finishing Touches
- Use wood filler to fill nail holes, and lightly sand.
- Put on your chosen finish, whether you’re going to stain the wood, add a clear sealant or paint. You will need to wait 24 hours for it to dry properly.
Design Ideas and Inspiration
Like the tongue and groove pine look, but can’t style it? These are some ideas to spark your creativity.
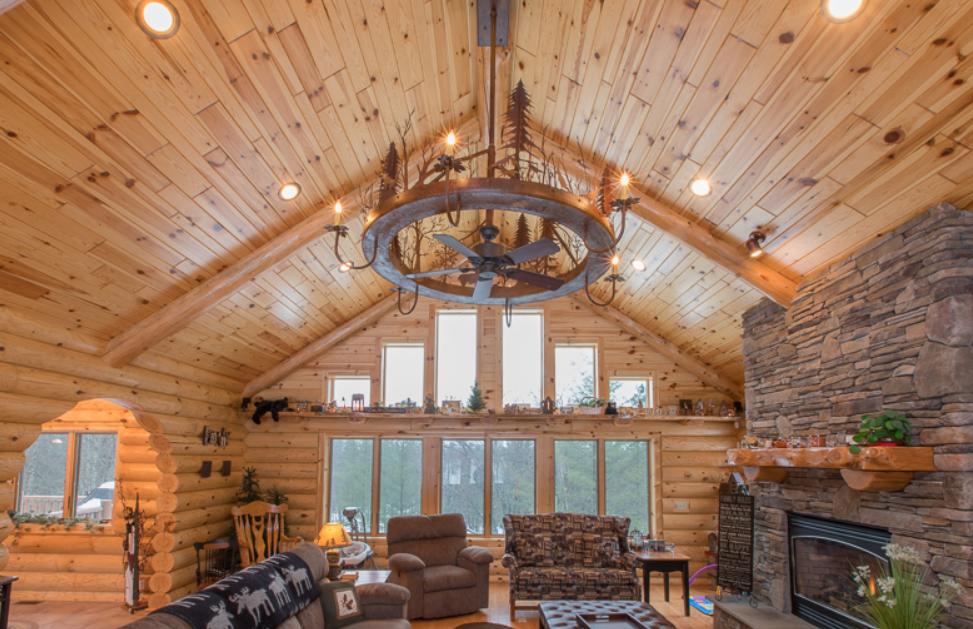
Rustic Living Room: Use unfinished pine boards to accentuate their natural grain and surround them with exposed wooden beams.
Modern Farmhouse Kitchen: White ceiling brings a fresh and airy feel. Introduce warm lighting fixtures for a cozier effect.
Cozy Bedroom Retreat: Go with a dark stain for the ceiling and add soft, neutral bedding. “This combo gives it a peaceful, cabin-type feel.”
Bathroom spa: Apply a polyurethane sealant for water resistance and marry it with stone walls or tiles for a luxury spa look.
Maintenance and Care Tips
Here are some maintenance tips to keep your pine ceiling looking its best for many years to come:
Dust: Duster or the long nozzle of a vacuum, clean and avoid dust accumulation
Don’t Get Too Moist: Humidity can cause warping or rot. In damp areas, consider a dehumidifier.
Waterproof (Moisture-Resistant) Sealant: Reapply this every couple of years if your ceiling is in the bathroom or kitchen.
Repair Scratches or Gaps: Small damages can be repaired with wood filler. You might need to sand and refinish for deeper scratches.
Sourcing Considerations and Costs
Tongue and groove pine ceiling cost varies based on wood quality and project size. Here’s a rough breakdown of possible future costs:
Material Costs: Pine boards will average about $2–$4 per square foot. Premium or pre-finished boards may be pricier.
Tools: If you don’t have the right tools for the job, think about borrowing or renting them, or investing in your own (nail guns and saws are especially nice to have for future projects).
Finishing Products: Paint, stain or sealant could add $30–$100 depending on your project size.
Where to Buy
The tongue and groove pine boards can be found at local home improvement stores like Lowe’s or Home Depot. For specialty products, search online retailers or lumber suppliers.
Troubleshooting Common Issues
Here’s how to troubleshoot some common problems you may face when installing:
Warped Boards: Acclimate boards by storing them indoors for 48 hours before they are installed so they adjust to room temperature and humidity.
Gaps Between Boards: Bang with rubber mallet on the edges to get a snug fit. Limited to only products that fit: check your boards are straight.
Wood for Splitting: A nail gun is more effective than a hammer, minimizes the impact and gives you more control.
The Benefits of Tongue and Groove Pine: Why They’re Worth It
A tongue and groove pine ceiling adds warmth, charm, and character to any room. Whether you’re drawn to rustic cottages or clean, modern lines, this versatile design choice elevates your home while withstanding the test of time.
Thanks to its affordable price point, do-it-yourself (DIY) installation option and evergreen appeal, it’s no surprise that so many people are embracing this classic style.
Your Next Step? Now it’s time to start bringing your vision to life! [Related: NOW OR NEVER: If You Have Pine Boards, Make a CeilingFriends and family will be blown away]