

The desk information was instantly very convenient especially when furniture displacement is for new! If you’re a new homeowner or simply just a DIYer there’s nothing quite so satisfying as seeing the results of your hard work. But the act of assembling furniture, as anyone who has stared at those famously inscrutable instruction manuals can testify, can ultimately challenge even the most unflappable person.
Thank you for reading this post, don't forget to subscribe!This blog walks you through it step by step. From prepping your materials to troubleshooting common snags, you’re about to be a furniture assembly dude. And you will have a sense of accomplishment by the end and not only a beautiful, functional desk.
Preparing for Assembly: Setting Yourself Up for Success
Preparation is essential before ripping open the box and trying to put it all together. If you jump to assembly without adequately planning it might lead to frustration and even mistakes.
Take Inventory
To do this: Open the box and verify all parts and hardware according to the instructions. A missing screw midway through your build can be a painful experience. Most furniture kits include a detailed parts list, so it can be helpful to take a moment to lay everything out.
Pro Tip: Use a tray or small cups to keep small pieces like screws, bolts, and nuts from rolling away.
Gather Your Tools
Some come with basic tools like Allen keys, but you’ll likely need additional tools for a smoother experience. You might want to have some of the following available:
- Screwdrivers (flathead and Phillips)
- Rubber mallet (for tapping pieces into place)
- Any power drill with the required bits
- Measuring tape
- Pliers
Optimize Your Workspace
You need space to build furniture. Make room that’s big enough to hold the furniture parts and to spread out. To protect the surfaces of either the floor or the furniture pieces themselves, lay down a soft sheet or a piece of cardboard on which these can be placed.
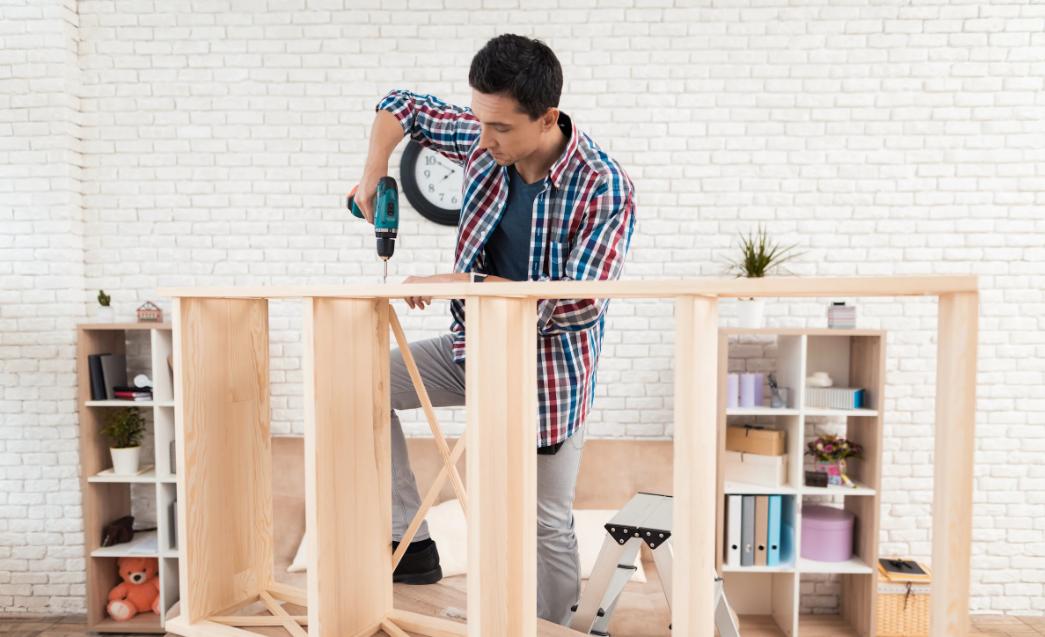
Step-by-Step Assembly Guide
When you’re ready, it’s time to begin. Step by step guide on how to assemble a desk
Step 1: Read the Instructions
So obvious, right, but it is often so tempting to skip this part. READ THE ENTIRE INSTRUCTION MANUAL FROM TOP TO BOTTOM BEFORE YOU DO ANYTHING. Learn how the elements work together and be sure to note any specific recommendations from the manufacturer.
Step2: Find the parts and mark them
Identify each piece and match it up against the listings in the manual. If they aren’t already labeled, use small sticky notes to label each part yourself. This will help you find what you need at each step more easily.
Step 3: Start with the Frame
Assemble the mainframe or base structure first. This is typically the base to which all the other parts will hang. Before tightening screws, double-check all alignments. Loose connections early on can cause problems later on.
Number 4: Add Panels and Surfaces
And once the frame is all secure, you can go ahead to attach some panels like the desktop. Follow the recommended order in the manual so that each panel fits snugly into place, and so you don’t have to force anything.
Step 5: Add Drawers and Accessories
If your desk has drawers, install the hardware before sliding them into place; be mindful of aligning tracks, and always ensure those drawers work smoothly. Everything besides cable organizers or shelves will be the last.
Step 6: Tighten Everything
Return and securely fasten all screws and bolts. Don’t overtighten, you’ll crack the wood or tear the materials.
Troubleshooting Typical Assembly Problems
Even the most systematic of builders can meet some hurdles. Here’s how to resolve common problems.
Problem 1: Missing Hardware
If you find a missing nail or screw, don’t sweat it. Some kits come with spare hardware, so check the box. If you’re really short, look up the hardware specs in the manual and go to a hardware store to find a match.
Problem 2: Misaligned Holes
Pre-drilled holes, it turns out, don’t always match up. Don’t muscle them into position, a practice that can damage the parts. Instead:
- Start by loosely securing all the screws and bolts, then move to alignment and gradual tightening.
- If that’s not successful, a round file can reshape the hole.
Problem 3: Wobbly Structure
If your desk wobbles, it is likely because you are not tightening it properly or that you have misaligned it. Loosen the offending part a little, get back in line, and tighten screws evenly.
Here’s problem 4: Confusing instructions
Certain manuals are downright infamous for their vague nature. If uncertain, do an online search for video instructions of your specific piece of furniture or similar projects. Fellow DIYers can be a lifesaver!
Relish the Result
Now that your desk is tall and functional, all that is left to do is enjoy your handiwork. Whether it’s a workspace, gaming hub or crafting station, you’ve constructed something that’s as useful as it is personal.
Takeaways and Call to Action
Assembling furniture isn’t just about desks or shelves; it’s about building confidence. If you prepare, approach it logically and meet challenges head-on, you come out with not just the perfect piece of furniture, but a sharpened skill.
Need more tips or tricks? Our to the rescue. From how to tackle all kinds of tricky builds to finding the best tools for DIY projects, there’s something for everyone.
So roll up your sleeves, prep your tools, and turn that unassembled box of parts into the desk of your dreams.