More and more homeowners and business owners are choosing rubber roofs for their homes and businesses because of rubber’s durability, low cost, and green-friendly properties. Whether you are dealing with a home renovation or exploring options for a new project, rubber roofs have several advantages that have made them an increasingly popular option in recent years.
Thank you for reading this post, don't forget to subscribe!Between the lasting longevity of a rubber roof to the environmental aspects, there’s truly something for everyone. In today’s post, we’re going to tell you everything you need to know about rubber roofing – including types of rubber roofing, how to install it, how much it costs, and the pros/cons – as well as how to maintain it for decades to come.
For those who are wondering if rubber roofing could be the right choice for their next project — read on.
The Basics of Rubber Roofing
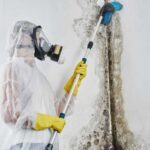
Rubber roofing remains relatively underground, though it has been around for decades as a means of protecting buildings. These are rubber-like layers of synthetic materials, including Ethylene Propylene Diene Monomer (EPDM) and Thermoplastic Olefin (TPO).
For flat or low pitch roofing, rubber roofing is highly used as it is made of materials that have high degree of flexibility, resistance to water and toughness.
Advantages and Application of Rubber Roofing:
- Extra long-lasting: When installed correctly and maintained properly, a rubber roof can last 20 to 50 years.
- Water proofing: This streamlined design significantly eliminates the risk of any water leakage.
- Energy savings: Some rubber roofs tap the sun’s UV rays, which can substantially cut a building’s cooling costs.
- Easy maintenance: Repairs are sometimes easier and less expensive than with other roofing materials.
Where Is Rubber Roofing Used?
Rubber roofing is a perfect fit for any building, so whether it’s a flat roof above a bay window, garage or on a store, rubber roofing is the ultimate solution. From tiny home expansions to warehouses and industrial structures, rubber roofs are an attractive option for most projects where the strength of traditional shingles just won’t suffice.
Types of Rubber Roofing
All rubber roofs are not the same. The industry has several available materials/processes, each having its pros and cons. Below we’ll outline some of the variants of rubber roofing that you can opt for.
EPDM (Ethylene Propylene Diene Monomer)
EPDM, known as rubber roofing to most, is a synthetic rubber roofing material commonly used on flat roofs and can be custom cut to fit any size of sloped roof.
Life Span: EPDM can resist UV, ozone and environmentally related failures for long periods of time.
It’s flexible and will not crack in cold weather.
Price: Inexpensive by dry roof counts.
TPO (Thermoplastic Olefin)
TPO offers great benefits and is also used in commercial and urban residential roofing as a popular choice.
- Energy-efficient choices: TPO membranes can be very reflective and have the potential to improve a building’s energy efficiency.
- Weldable seams: These offer more waterproofing than adhesive seams.
- Chemical resistance: TPO is superior in chemical or dirt exposure situations.
Modified Bitumen and Everything Else
Needless to say, EPDM and TPO are what dominate the marketplace, though materials such as modified bitumen and PVC are still used when a certain type of roof calls for it. They all offer different levels of performance, water resistance, and cost, but they can be good options depending on the nuances of your project.
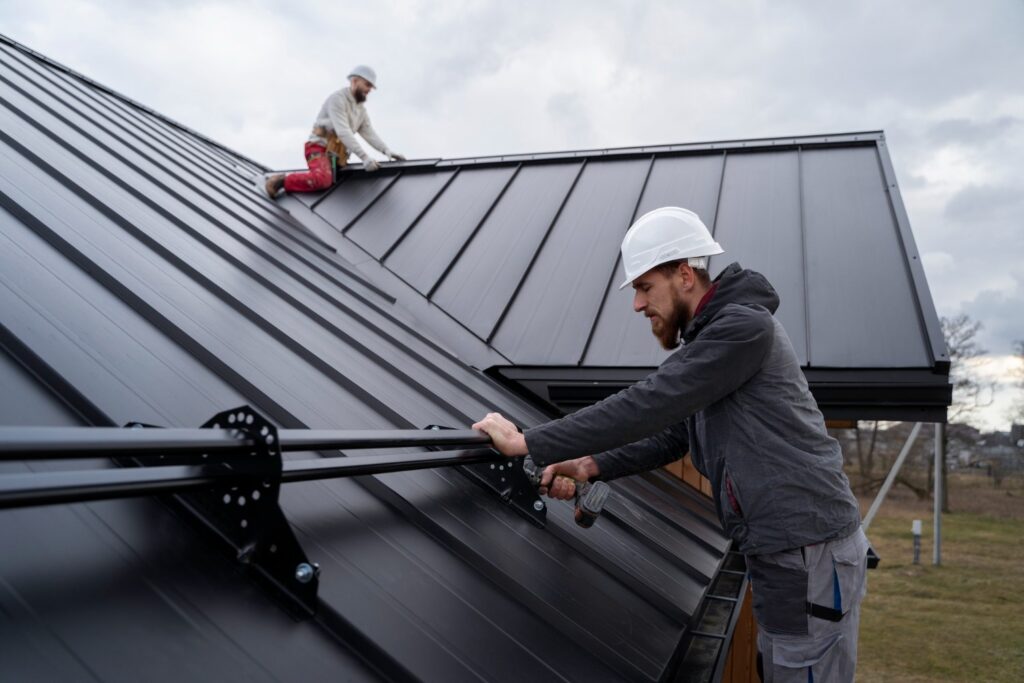
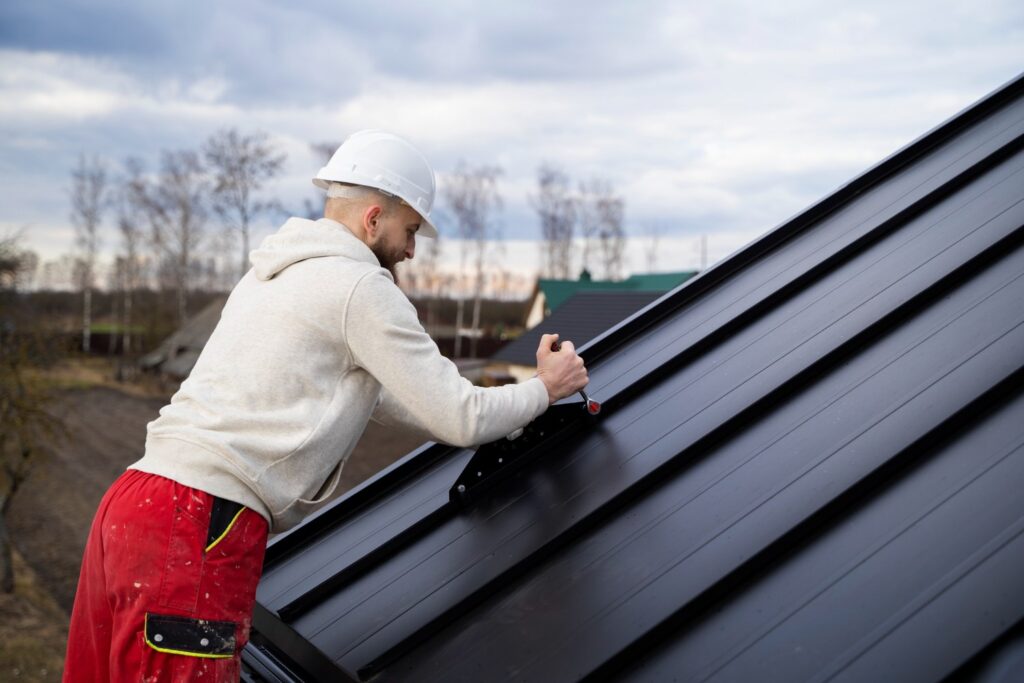
Installation Process
The process of installing a rubber roof sounds complex, but when you have the help of an experienced team, it’s a relatively straightforward process. Here is a step by step explanation of what to expect during installation of rubber roofing.
Step 1. Inspection and Measurement
An Investigation- Examine, Measure The first step is to take stock and measure the roof to see if the material specifications are right and for any potential problem areas that need fixing.
Step 2. Washing and Priming the Surface
The area needs to be smooth and clean in order for the decal to adhere correctly. This process may also include pressure washing the existing roof and repairing any cracks or irregularities in the old roof material.
Step 3. Applying Adhesive
In order to lay the rubber roofing down, glue must be spread around the whole of the roof, or it must be put directly on the rubber sheets.
Step 4. Laying Rubber Membranes
Rubber sheets — some quite large, like the one Newby uses — are unrolled and meticulously squeegeed to prevent wrinkles or pockets of air. Seams are glued or heat-welded for water tightness.
Step 5. Detailing and Sealing
Edges, corners, and ventilation holes are clarified for proper sealing and water-resistance. When done, the roof is inspected for open spaces or areas of adjustment.
Cost Analysis
Is rubber roofing economical? The short answer is yes.
Key Cost Points:
They generally cost between $3 and $8 per square foot for materials, with EPDM rarely being on the higher end.
Installation labor rates vary but average $4 to $10 per square foot.
In other cases (such as for flat or low pitch roofs), rubber roofing can be the most cost-effective solution over the life of the rubber for it’s durability and repair-free cost.
Advantages And Disadvantages Of Rubber Roofing
Just like any thing in life, rubber roofs have their good and bad points.
Advantages
- Unsurpassed in Durability: Rubber membranes contain no plasticizers which become brittle with age and can cause cracks or splits.
- Long lasting: Puncture Proof, Musk resistant & UV resistant.
- Eco- friendly: A lot of rubber roofs are even recyclable through and after their lifespan.
Disadvantages
- Initial Cost: Rubber roofing is a specialty product which may cost more to install than asphalt shingles.
- Looks: Rubber roofs are mostly black, and aren’t everyone’s cup of tea in terms of looks. (White and other coated versions are also available.)
How to Take Care for Maximum Lifetime
Rubber roofing requires very little maintenance and with proper care it will last for decades.
Regular Inspection: Look for tears, cracks, or lifting seams that could occur following severe weather.
Keep everything clean: Clear off debris, snow and leaves to avoid putting extra weight on the roof.
Use Roof Sealant UV protectant sealant every couple of years helps reduce wear from exposure.
Environmental Impact
Another less known benefit of rubber roofing is its contribution to the environment.
- Energy Reflectance: A TPO roof also reflects more sunlight, MOA hence bringing down energy consumption and carbon footprints.
- Recyclable: Rubber membrane production involves processes used to recycle old rubber membranes into new products.
Success Stories from the Rubber Roofing Industry
- Commercial Warehouse in Texas: The flat TPO roof decreased the building’s energy use by 25% in this structure’s first year.
- New Jersey Residential Rooftop: After ten years in, this homeowner hasn’t had a single leak and had little maintenance when selecting EPDM for their sloped garage roof.
Typica Rubber Roof Repair and Maintenance Costs.
- Surface ponding water: Avoid by installing drainage properly.
- Shrinkage: Can be minimised with regular checking and immediate sealing of joints.
- Punctures/Tears: A fast stick from the matching adhesive and you’re good.
Is Rubber Roofing Right for You?
Rubber roofing isn’t just a fad, it’s a long-lasting, sustainable, adaptable material that can accommodate today’s challenging roofs. It’s affordable, energy-efficient, and durable making it a good choice for many homeowners and commercial property owners.
If you are weighing the possibility of installing a rubber roof on your next project, contact an experienced local roofer to discuss your options and receive your individual assessment!